Quick start guide
Goal
By the end of this guide, you will have a working free download product on your site: a WooCommerce product with a Download Now button that delivers files without checkout.
Prerequisites
- WordPress 6.4 or higher
- WooCommerce 8.0 or higher, installed and active
- Free Downloads for WooCommerce (free or Pro) installed and activated
- A file you want to offer as a free download (e.g. PDF, ZIP)
Steps
Step 1: Create or edit a product
Create a new product or use an existing one.
Create a new product
- In the WordPress admin, go to Products → Add New.
- Enter a product name (e.g. "Free eBook: Getting Started Guide").
- Add a product description and short description.
Or edit an existing product
- Go to Products → All Products.
- Click Edit on the product you want to make a free download.
Step 2: Make the product virtual and downloadable
The product must be both Virtual and Downloadable for the plugin to replace "Add to Cart" with a download button.
- In the Product Data section, open the General tab.
- Check Virtual (this removes shipping options).
- Check Downloadable (this shows the downloadable files section).
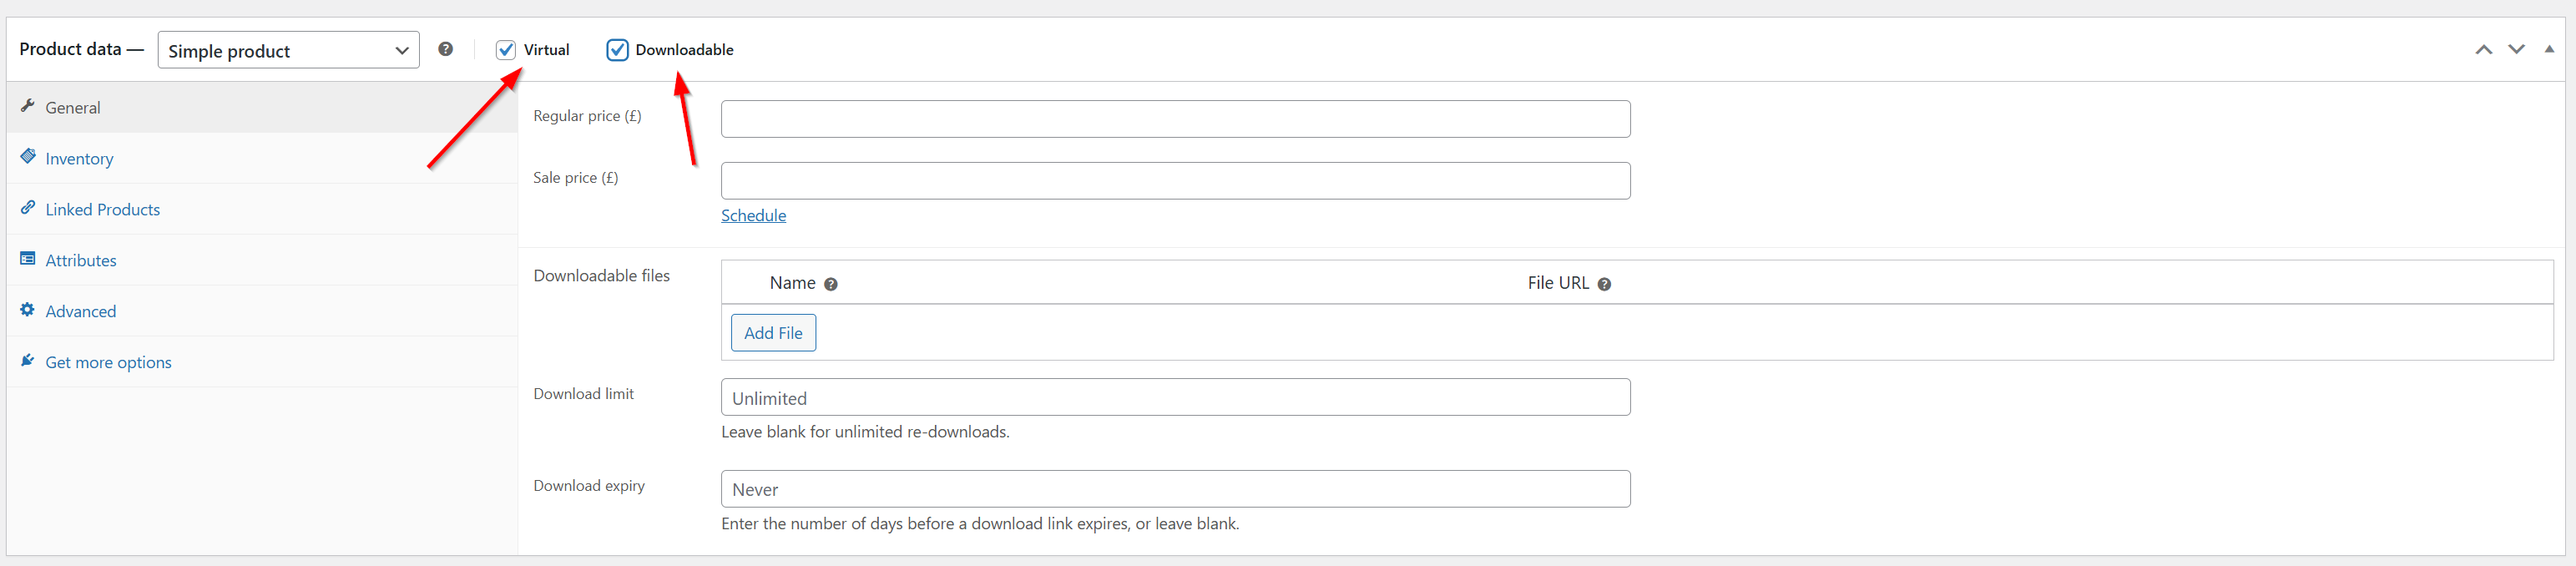
- Virtual: Digital products do not need shipping, so this removes shipping fields.
- Downloadable: Tells WooCommerce and the plugin that the product has files to download.
Step 3: Set the price to zero
The plugin treats products with a regular price of 0 as free downloads.
- In the Product Data section, ensure the General tab is selected.
- In Regular price, enter 0.
- Leave Sale price empty.
To allow products that are on sale for free, enable this in the plugin settings. By default, only products with a regular price of 0 are treated as free downloads.
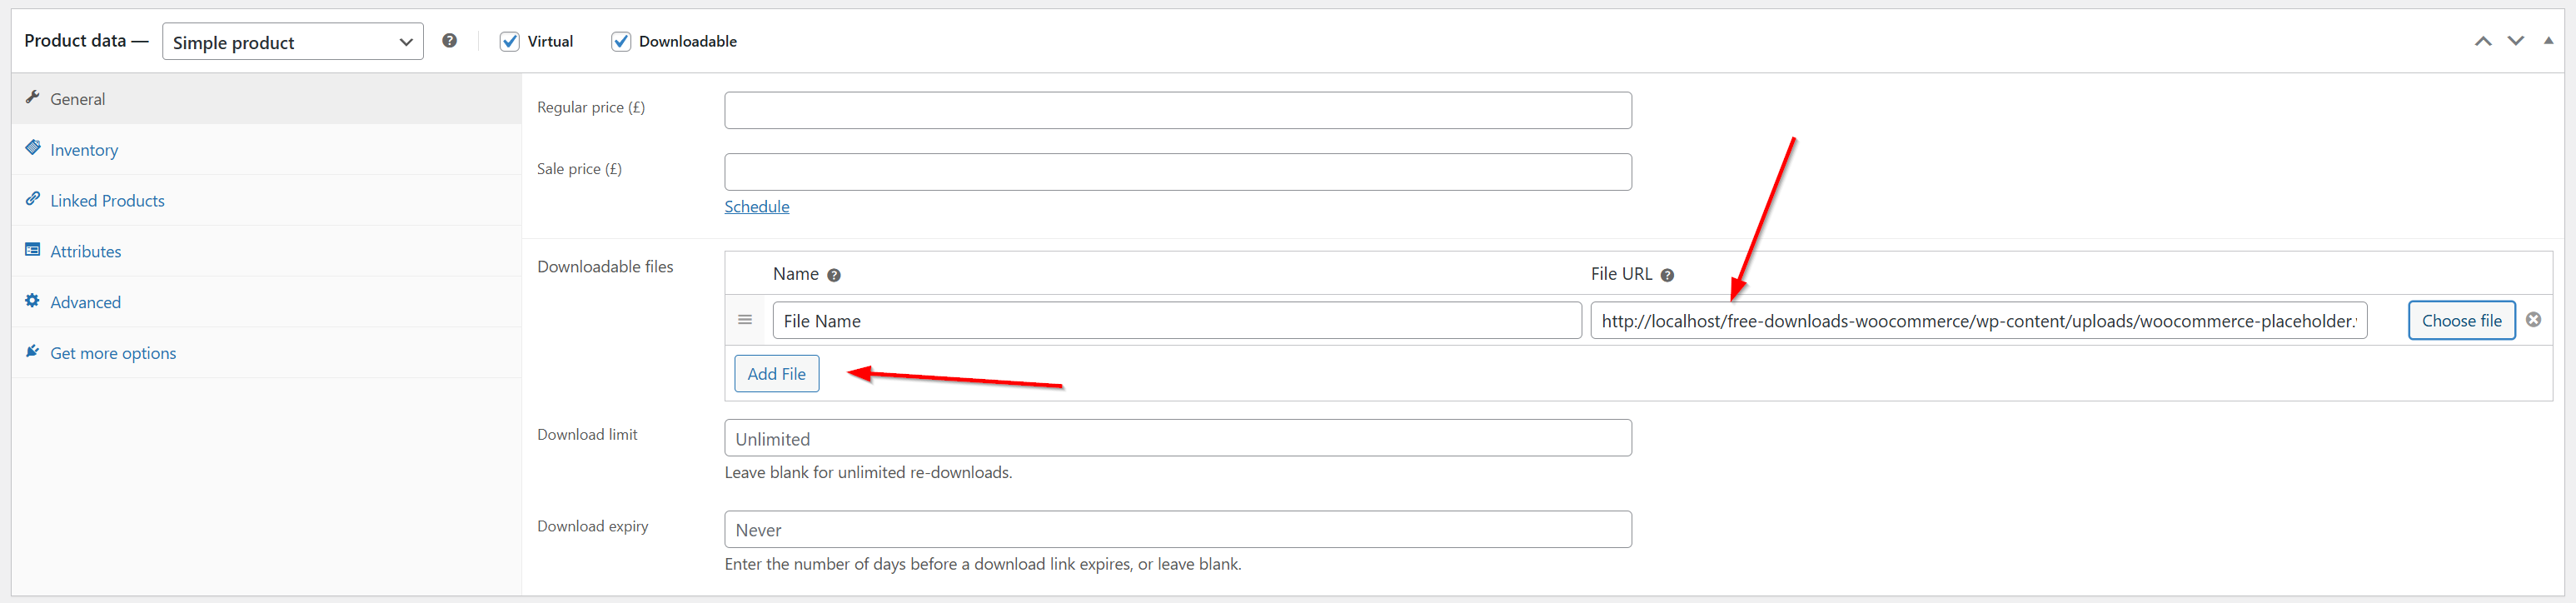
Step 4: Add downloadable file(s)
Add the file or files customers will download.
- In Product Data, find the Downloadable files section.
- Click Add File.
- Enter a File name (the label shown to customers).
- Set the File URL by either:
- Clicking Choose file to upload from your computer, or
- Clicking Insert from URL to use an external link.
- Click outside the file row to save.
Multiple files: Click Add File again for each extra file. The plugin supports multiple files with different display options (e.g. individual links or a single "Download all" ZIP).
For best results, upload files via Choose file. External URLs work for single files but can have limitations with ZIP creation for multiple files.
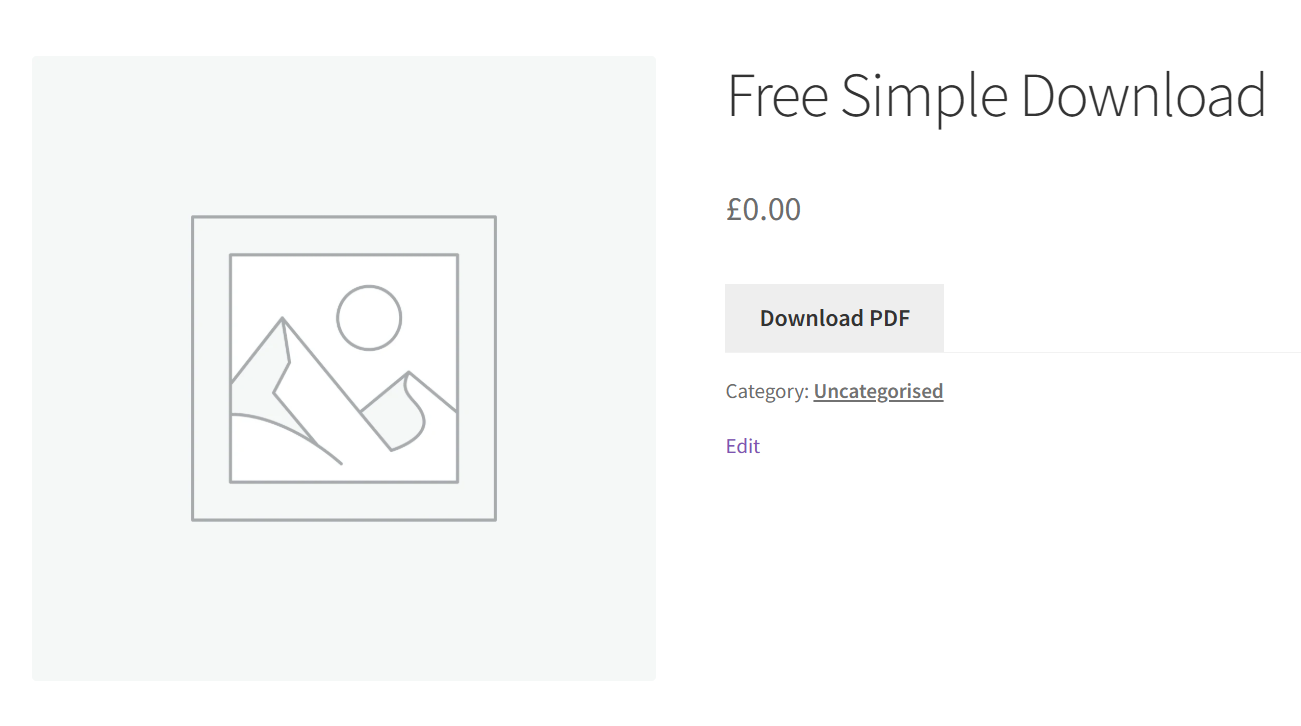
Step 5: Publish and view on the frontend
- Click Publish (or Update if editing an existing product).
- Click View Product to open the product on the frontend.
What customers see
- Single file: A Download Now button; clicking it starts the download.
- Multiple files: Either a list of download links or a Download All (.ZIP) button, depending on your settings.

Verification
Confirm the free download works:
- Open the product page in a new browser window or incognito mode.
- Click the download button or link.
- Confirm the file downloads and opens correctly.
- Test in an incognito or private window to match the guest experience.
- If "Require login" is enabled in settings, log in before testing.
- Check that the downloaded file is not corrupted.
If you see "Add to Cart" instead of a download button: Ensure the product is Virtual, Downloadable, has Regular price set to 0, and has at least one file in Downloadable files. Clear browser and plugin caches and test again.
If you use a page builder (e.g. Elementor): Sometimes the download button does not show because the builder's product blocks or modules do not include the WooCommerce hooks the plugin needs. Add the button using the [download_now] shortcode in a Shortcode widget or block—e.g. [download_now id="123"] with your product ID. See Shortcodes reference.
If the button does not start a download: Check that the file URL is valid and the file is accessible, and try another browser. For more help, see the Troubleshooting guide.
What's Next
- Display options — Change button text, appearance, and behavior.
- Multiple file downloads — Configure how multiple files are shown.
- Settings reference — All plugin settings.
- Troubleshooting — Fix common issues.